
Straight to the Point…
For air travel, carry-on packing affords you lighter weight bags for easier handling, avoids losing your bags and paying baggage fees, and teaches you to travel with less. Checking a larger bag allows you to have more outfit choices, bring larger amounts of liquids, and plan for what-ifs. Most trips can be done using these helpful carry-on packing techniques.
Now, on to the info you need…
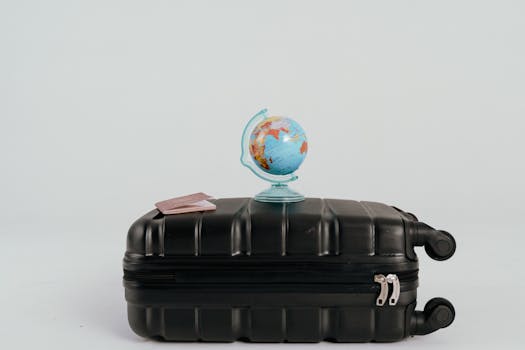
Trust me when I say that I will never again take a bag larger than a carry-on to Europe. I had to learn the hard way on cobblestones, so take my advice and save yourself some of these headaches.
Before I piss someone off, because, well, I’m not everyone’s cup of tea, I’m not shaming people who check their bags. This article is truly about learning to pack in a carry-on, if that’s what you choose to do. If you are interested, please read on. If you are not, please move on.
What is Carry-On Packing?
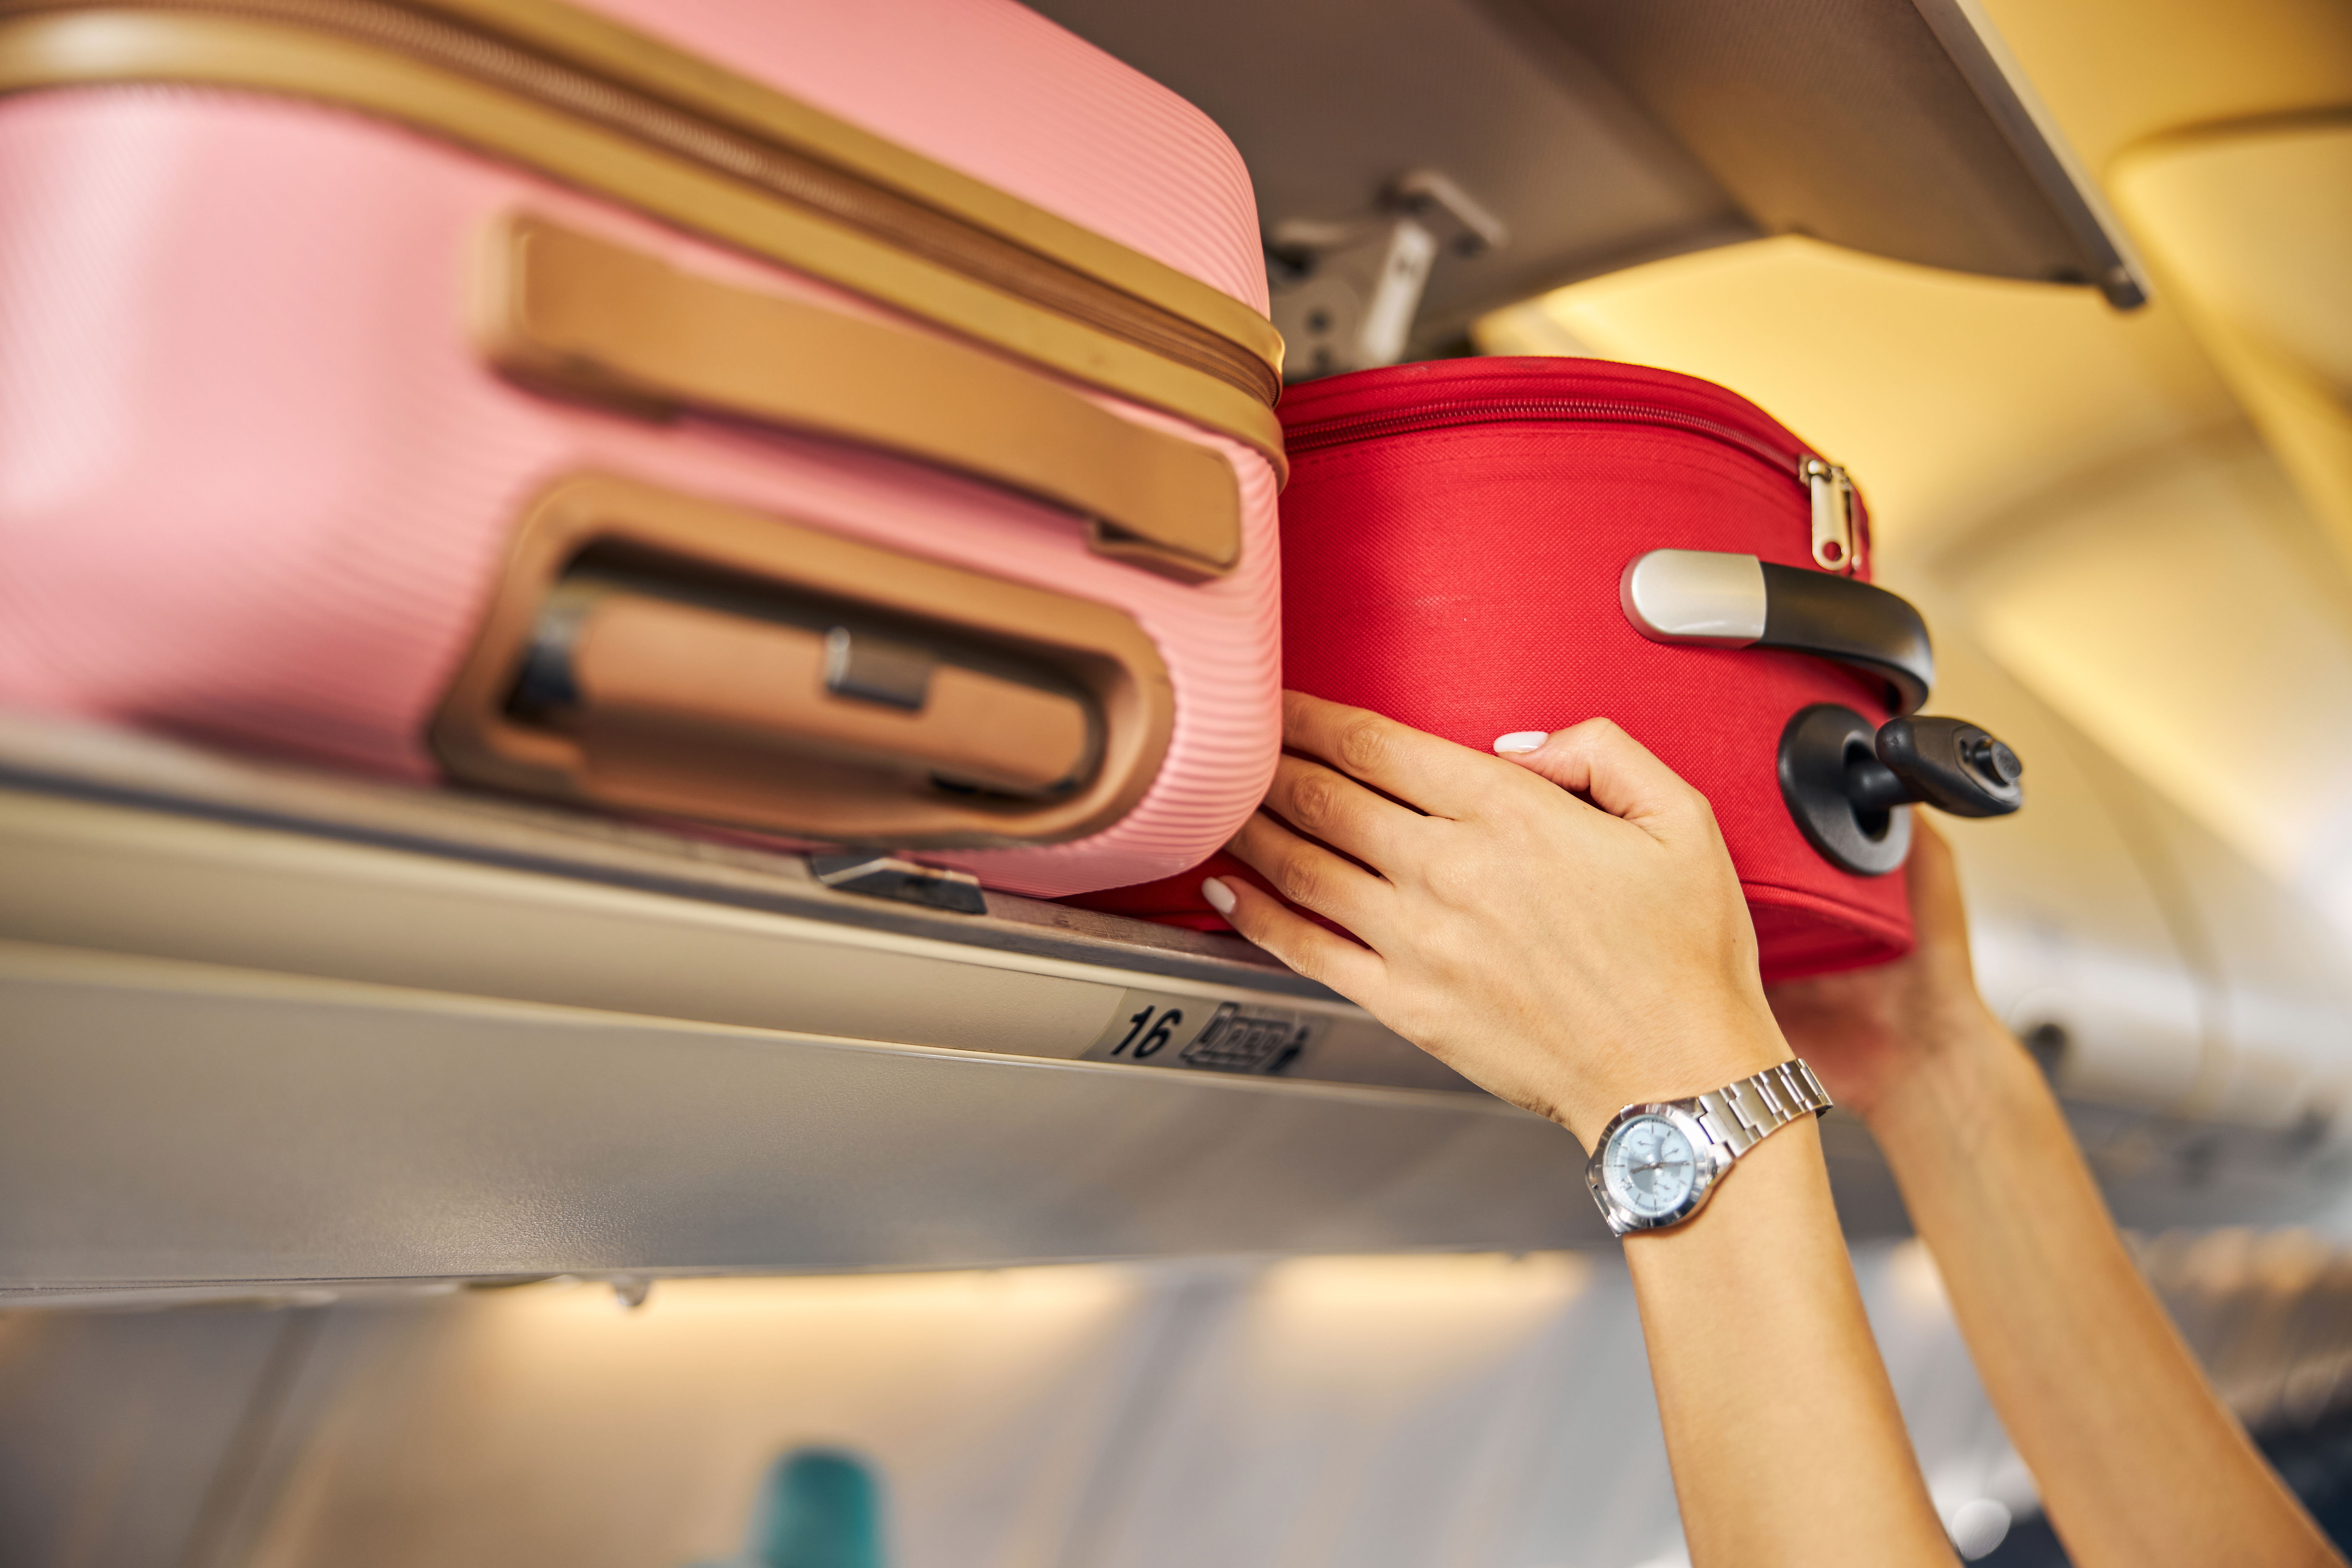
Carry-on packing is not checking bags for air travel. Carry-on packing involves using one rolling bag, duffel bag, or similar bag, that is sized to fit in the overhead bin, plus one personal item that is sized to fit under the seat in front of you. Most airlines restrict you to bringing only two bags into the cabin.
Advantages to Flying Carry-On
- No Lost Bags. It greatly reduces the chance of having your bags lost in transit, although airlines can still require you to gate check your bags at boarding for various reasons.
- Keep Your Belongings. You always have your belongings with you in the case of cancelled or delayed flights. (In Detroit, I once had an overnight flight cancel and was able to go straight to the hotel while my fellow passengers waited Three. Long. Hours. for the airline to retrieve their checked bags.)
- Cruise Risk Free. You never risk boarding a cruise ship without your bags. Google that for some frustrating stories.
- Handling. It makes being responsible for your own baggage much easier. I refuse to pack a bag that I cannot personally lift or carry by myself, including placing in an overhead bin. When the time eventually comes that I cannot handle my own bags, I will start checking and take my chances.
- Saves Time. It avoids time spent waiting at the baggage claim carousel.
- Saves Money. It reduces potential overweight baggage fees. (In Louisville, I once paid $75 to Southwest, who allows you two free 50# bags, for my one 58# bag, when I was inexperienced and didn’t know better.) In addition, many airlines are now charging for checked baggage, whereas carry-on bags are often (but not always) free.
- Public Transit. It makes traveling by public transit such as busses, trains, taxis, etc. much easier by having lightweight, manageable bags to carry when getting on and off. (In Belgium, I once got my 50# bag and my tote caught in a bus door trying to exit and couldn’t get out the door, so had to ride to the next stop and walk back.)
- Stairs. It makes navigating stairs in train and bus stations easier by carrying smaller bags and by limiting how much weight you can pack in your bag. There are usually elevators, but they are not always functioning.
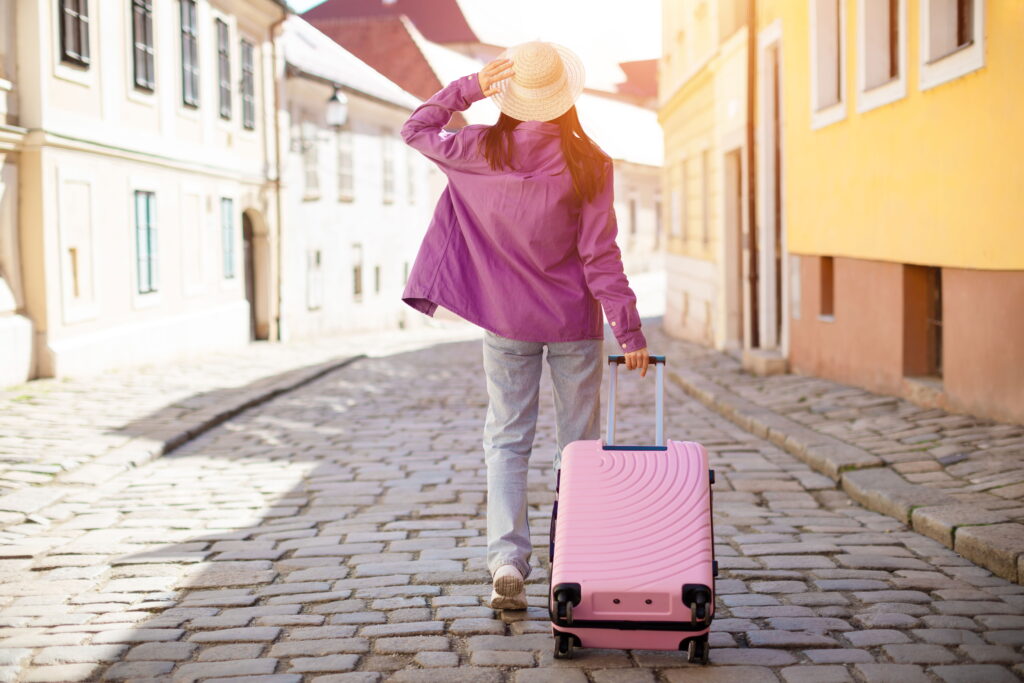
- Getting Around. It makes carting your bags over cobblestones much easier. (I once dragged that same 50# bag about a mile to our hotel when I thought it would be a nice day for a walk. I was wrong!)
- You Can Buy Stuff. You can actually buy anything you need all over the world. I shit you not, they sell sunscreen in Iceland, contact solution in Hungary, and toothpaste in Romania. Who knew??? So don’t worry about how you’re going to get all those liquids in your carry-on bag, because you’re not.
- Needs vs. Wants. Finally, packing in a carry-on teaches you how little you truly need.
Disadvantages to Flying Carry-On
- Liquids. The biggest disadvantage to flying with carry-on luggage is the inability to carry larger quantities of liquids, due to the TSA’s current 3-1-1 rule for flying with liquids. You can read more about the 3-1-1 rule in my article about TSA Pre-Check here, or on the TSA website here. Briefly, if you are carrying any liquids into the airplane cabin with you, those liquids are restricted to fitting into one 1-quart zip top bag per person. (There are exceptions for some liquids such as baby formula and medications.) Checking your bag allows you to carry larger quantities of liquids. Individual TSA agents do not always enforce this rule consistently, so this creates a bit of confusion, but as of 2026, it is still the rule and it is posted on the TSA website. This is generally also the rule world wide, but it is slowly changing as airports roll out new scanning technology, so check your airport rules before you fly.
- Space. If you are going on a specific type of trip and need for example, hiking poles or boots, snorkel gear, or formal attire, or you are planning for vastly different climates and/or activities, then you may need more room than a carry-on sized bag affords.
- Choice. If you really need or want a different outfit for every day, and don’t want to do any laundry on your vacation, you will need a bag larger than a carry-on to accommodate these choices.
To be perfectly clear, there is no right or wrong way to pack. Checking vs. carry-on is not a one size fits all option for me. Different trips call for different packing strategies. We went to the beach recently and checked our bags because we packed beach gear and board games. I am simply giving you ways to think about this choice differently. Lighten your load, embrace the adventure, and stop worrying about someone seeing you in the same outfit three times. Oh, the horrors! In the end, it’s the memories that matter.

Tips to Packing Carry-On
Here is the big secret: carry-on packing is not about how much you can stuff into a smaller size bag and a backpack and have them bursting at the seams. Rather, it is about how little you truly need for your trip. If you truly want to minimize some of the risks I listed above, you can take simple steps to reduce the amount of items you pack. Here’s how:
Create and Use a Packing List
Use any format you like. Word document, excel spreadsheet, pen and paper, notes app in phone, packing or closet app, papyrus, or chisel and stone. You can find downloadable packing lists online. I use a word document that I can copy and paste for my next trip because many things are the same. Some people use a closet app such as Style Book to make a packing list, but I find it is quite a bit of work and too time consuming. The important thing is that you make a list and stick to it.
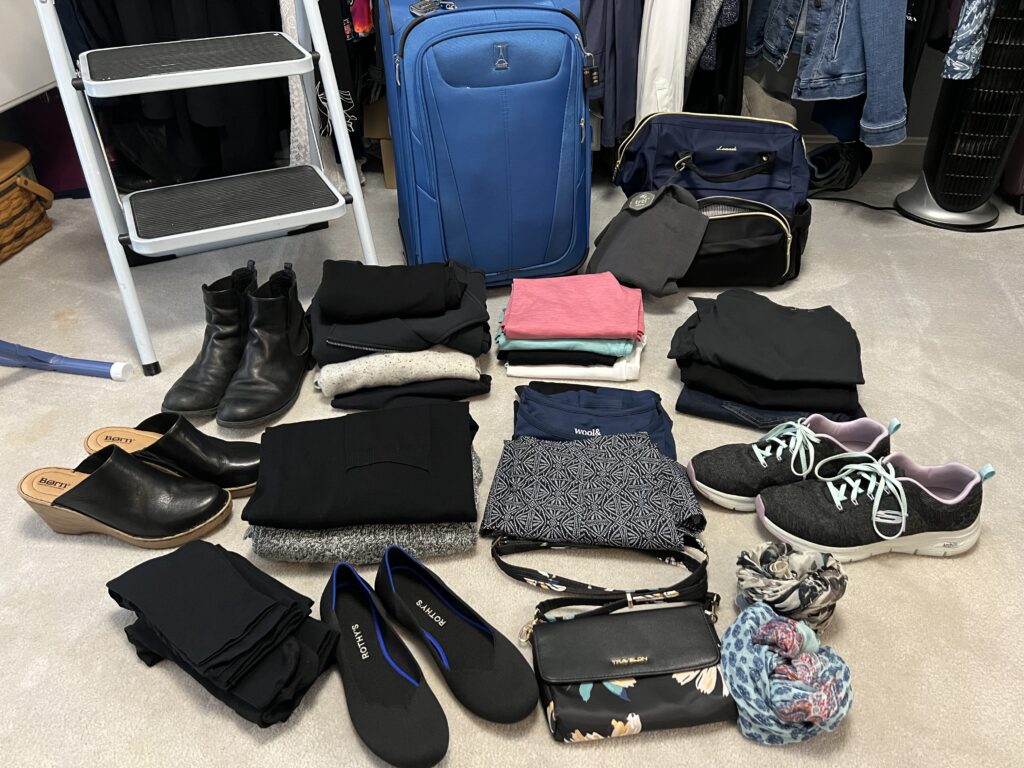
Divide your list into categories for bottoms, tops, layers, shoes, undergarments, outerwear, electronics, jewelry, makeup/toiletries (non liquids), 311 liquids bag, miscellaneous, buy at destination, or any other specific categories you need. See my tips to pack liquid toiletries here. If you are super organized, add which small bags and pouches these items will go into when packing to help you stay organized. I use a variety of zipper pouches, a couple zip lock bags, and other small packs I have collected over the years. Some folks like a hanging toiletry bag. Some folks like packing cubes. I don’t like either of those things in general. However, I do now pack all my undergarments in a single packing cube, to prevent them from being displayed to the public in the case of a random TSA search. Yes, some of the people in line at security in Amsterdam have admired my bras and underwear.
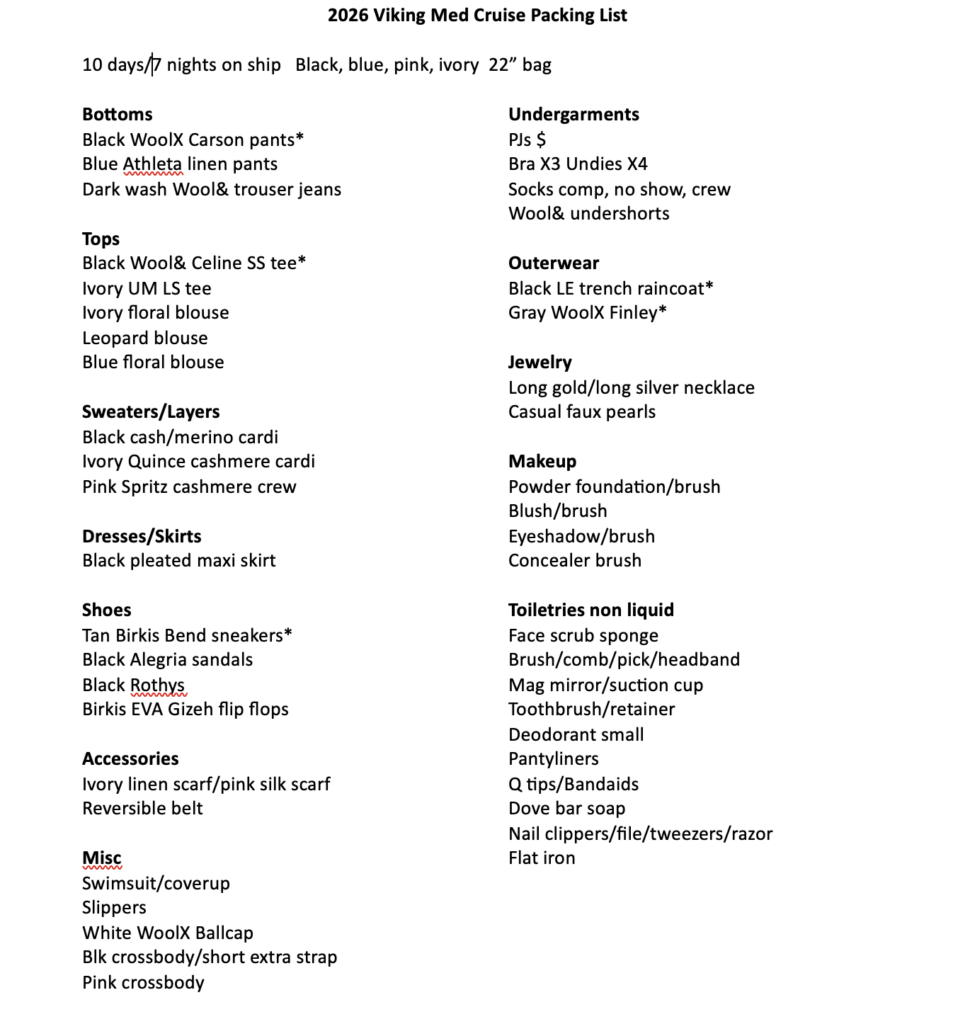
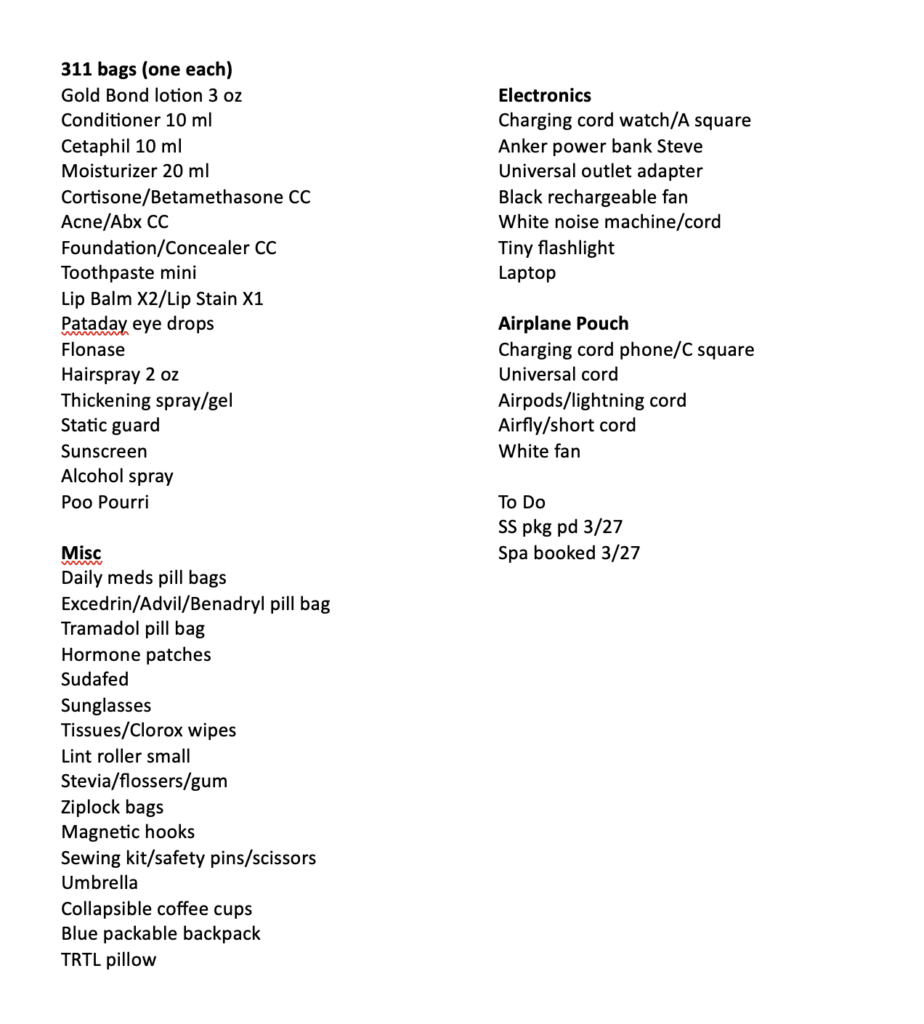
Below I have included one of my packing lists, made using a Word document. I ended making a couple changes to this, but you get the point. Make a list.
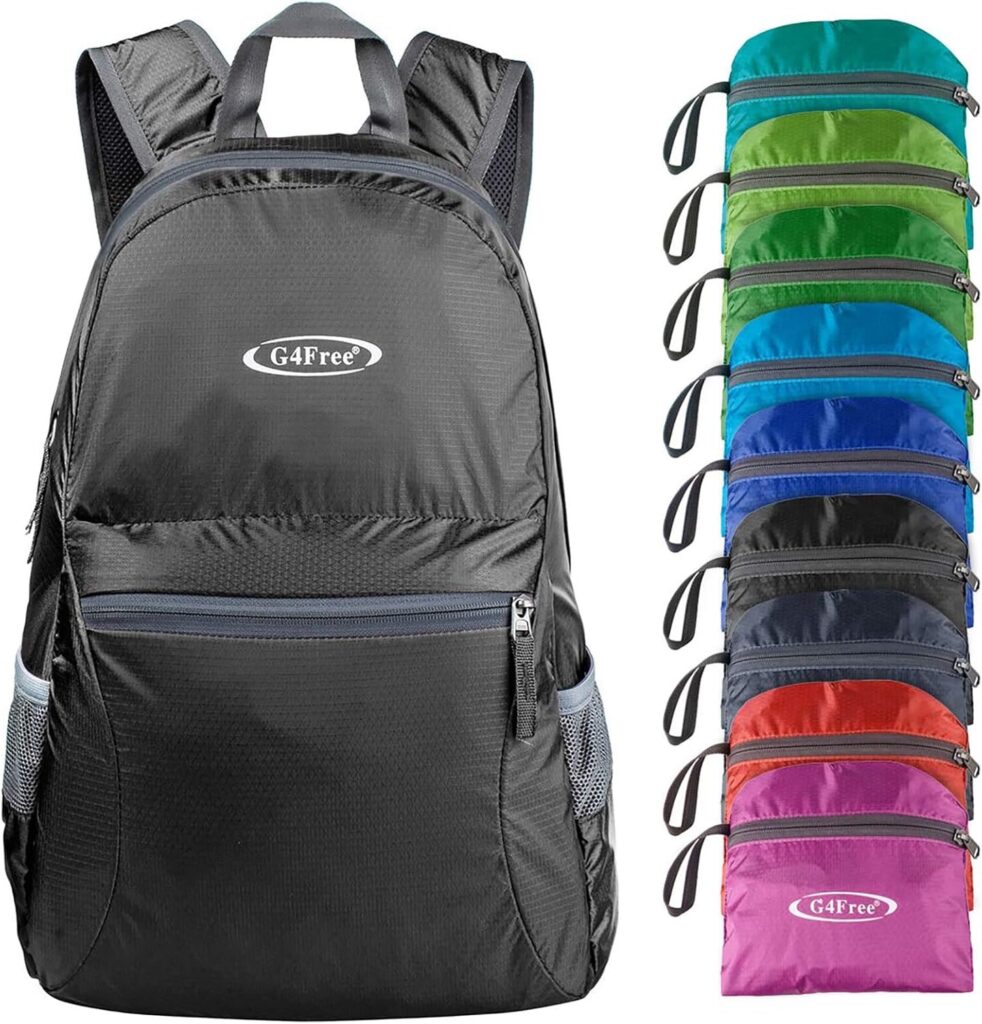
Choose a Bag and a Personal Item that are Lightweight
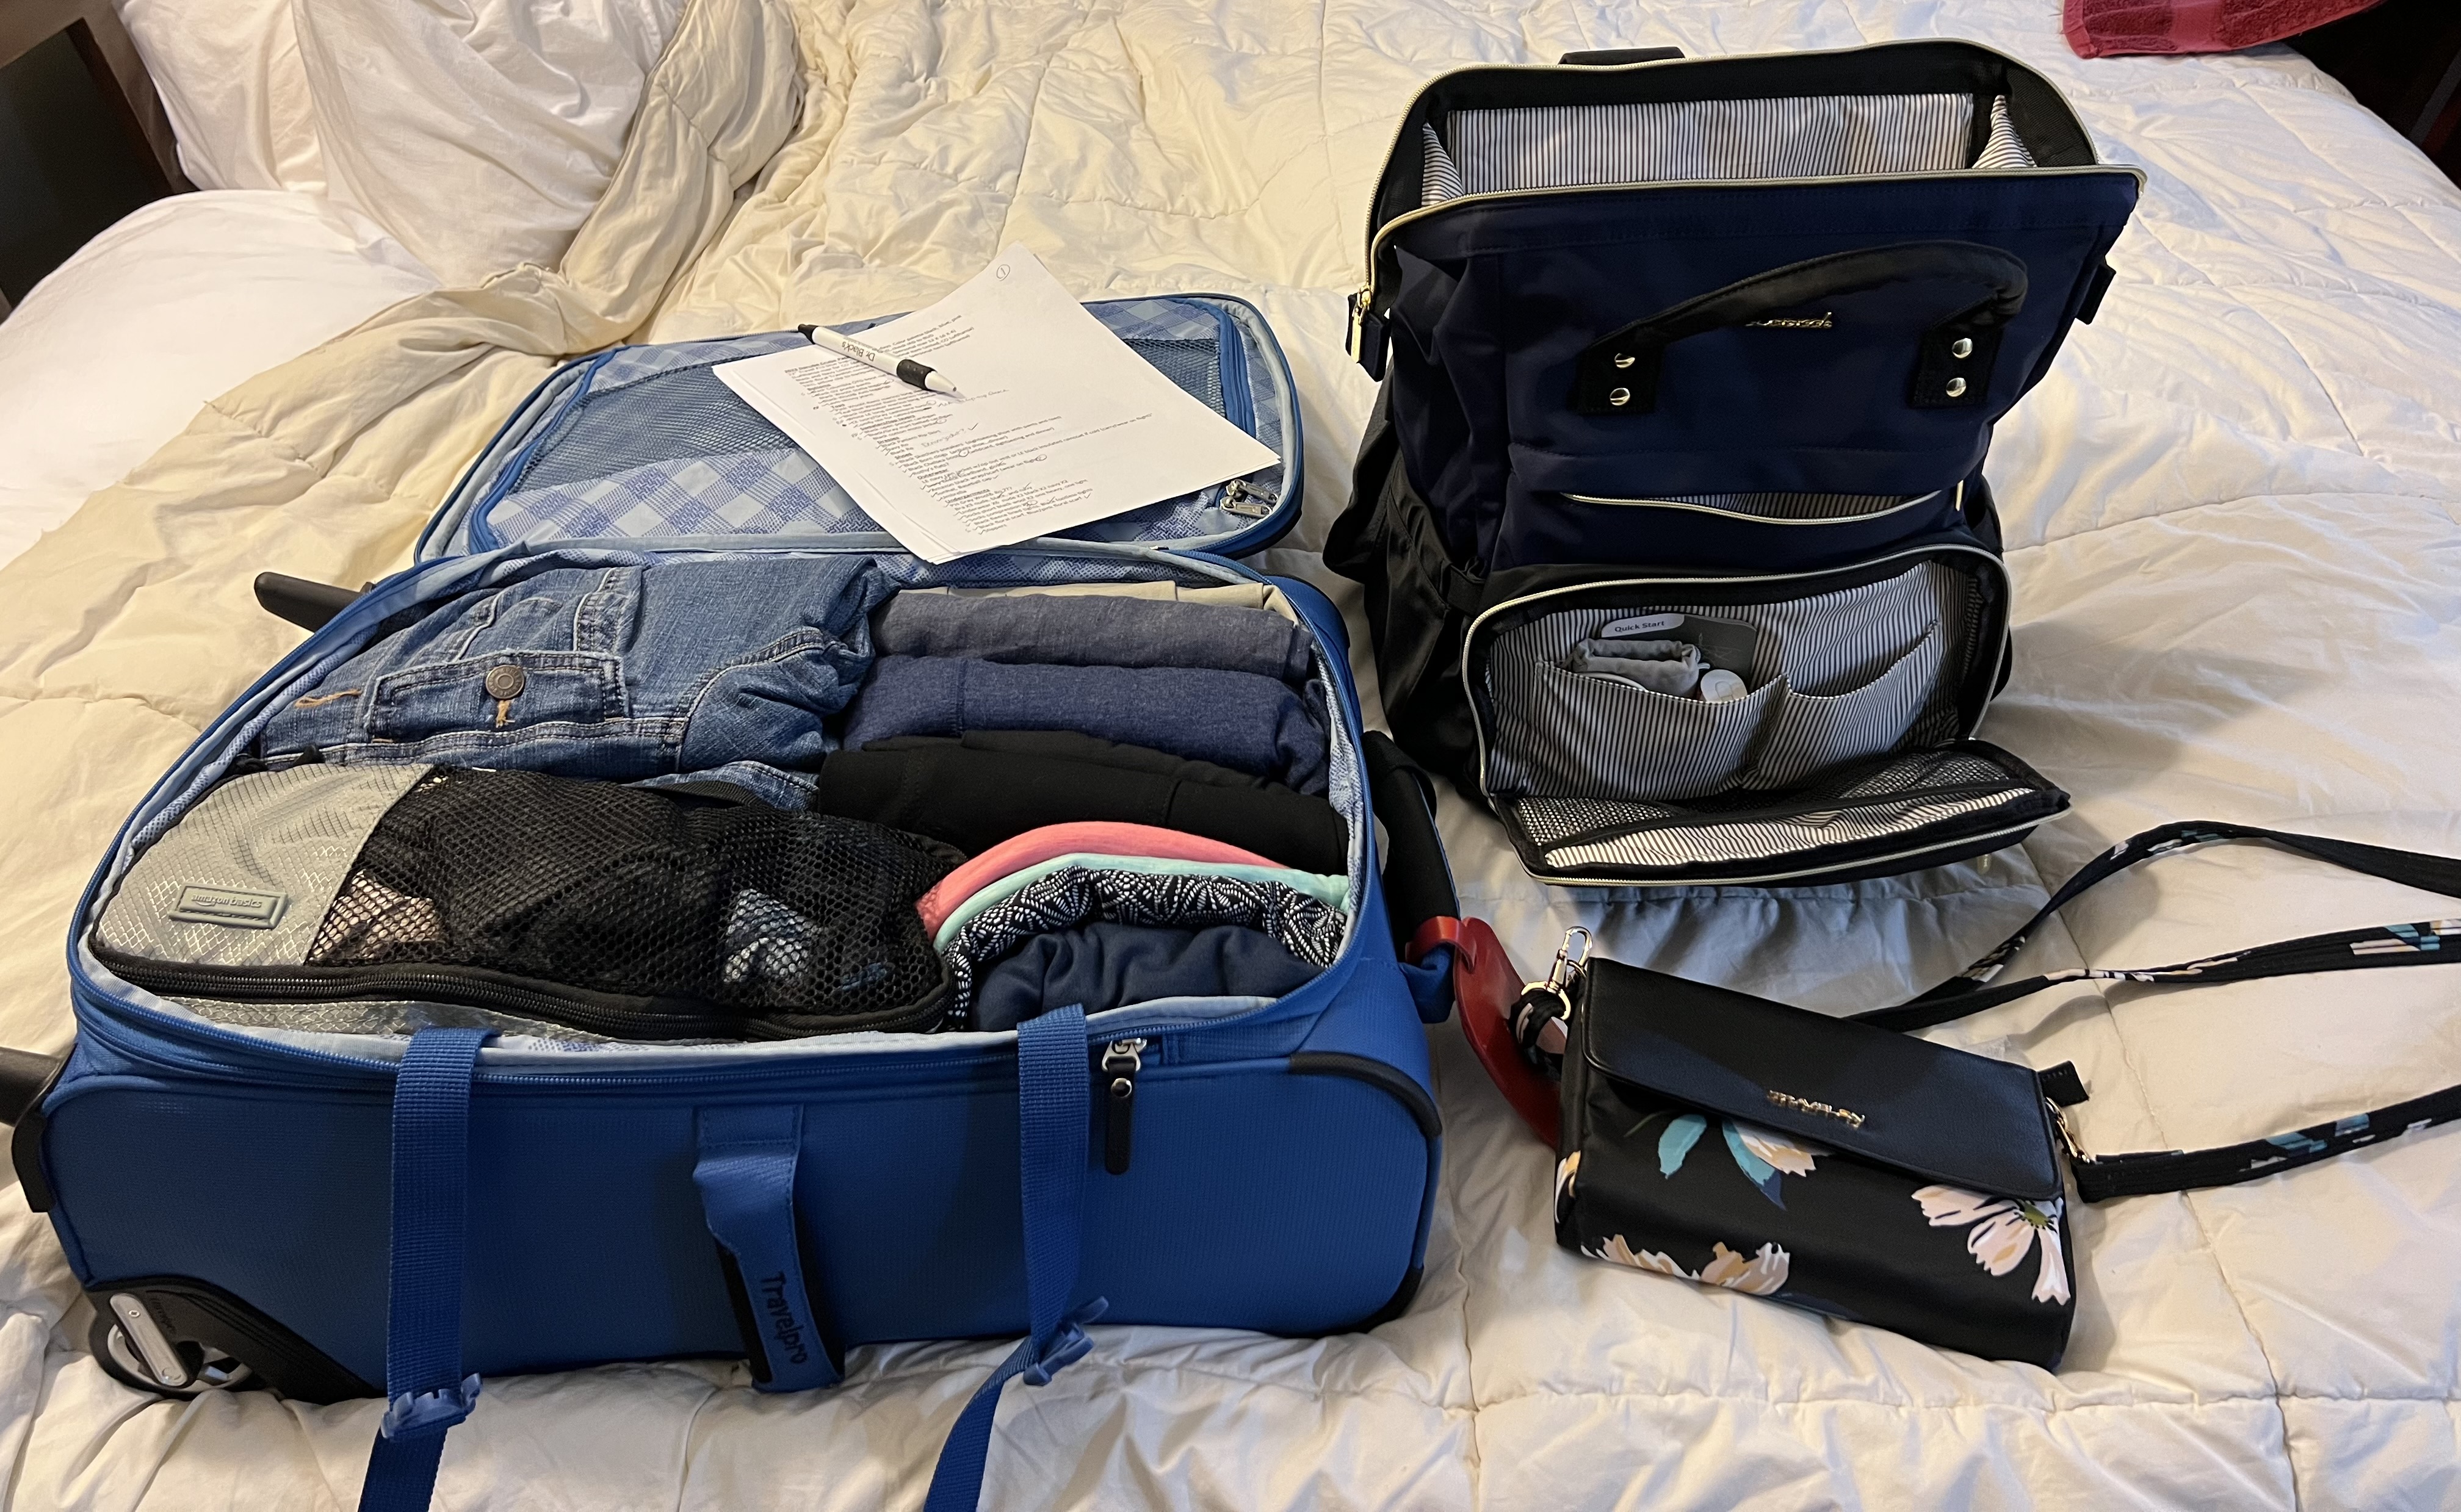
I have a 20” international sized Travelpro Maxlite 5 and a 22” Travelpro Maxlite 5. Both are two wheeled bags and weigh about five pounds each. I also have several different sized backpacks and under seat bags to choose from. It’s important to choose the bag now, so you don’t change your mind later and decide to check a larger bag. (See all that shit I wrote above.) Many rolling bags can weigh eight to ten pounds empty, so the weight of your empty bag will definitely matter if your airline has a weight restriction, and to reduce your overall weight for transporting the bags.
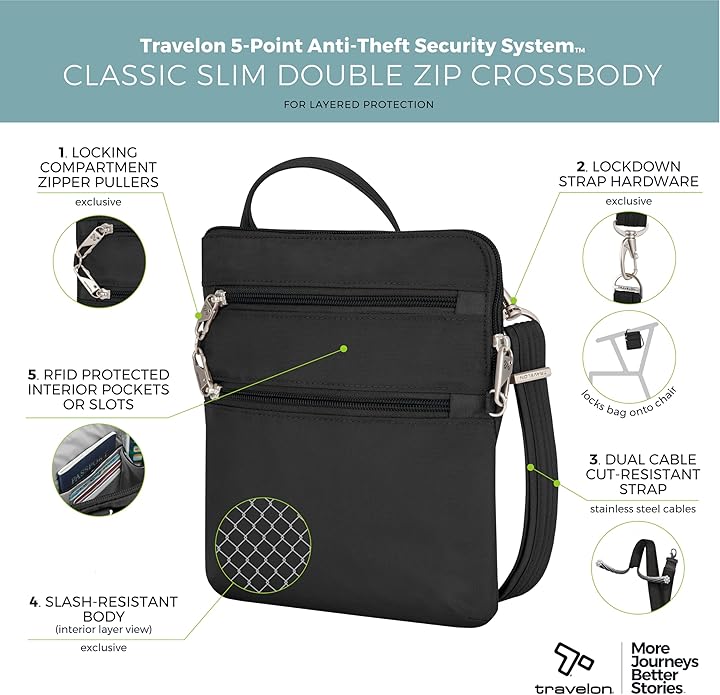
Select a Day Bag that is Lightweight and Versatile
Use a crossbody bag, tote, or smaller packable backpack, whatever is easy for you to carry daily essentials, based on your planned activities. One day bag and one evening bag is enough for me. I carry a crossbody bag for daily touring. I often add a small clutch for evenings or dinner, or alternately, I just switch out or remove the handle on the crossbody bag for evenings, depending on my trip. My husband carries a small packable backpack for touring. This day bag should fit into your backpack or personal item for boarding an airplane. Most airline guidelines limit your carry-on items to two per person, so you will likely need to combine your day bag and backpack. I normally just pack my cross body bag empty and don’t use it until we arrive at our destination. Recently, I read a tip to use your purse or day bag as a pouch or packing cube to pack things in for the trip. You would empty it out at your destination and then use it as your purse. I thought it was a brilliant idea. I tried it on our recent Viking Med cruise and it worked well.
Add a Daily Itinerary to Your Packing List
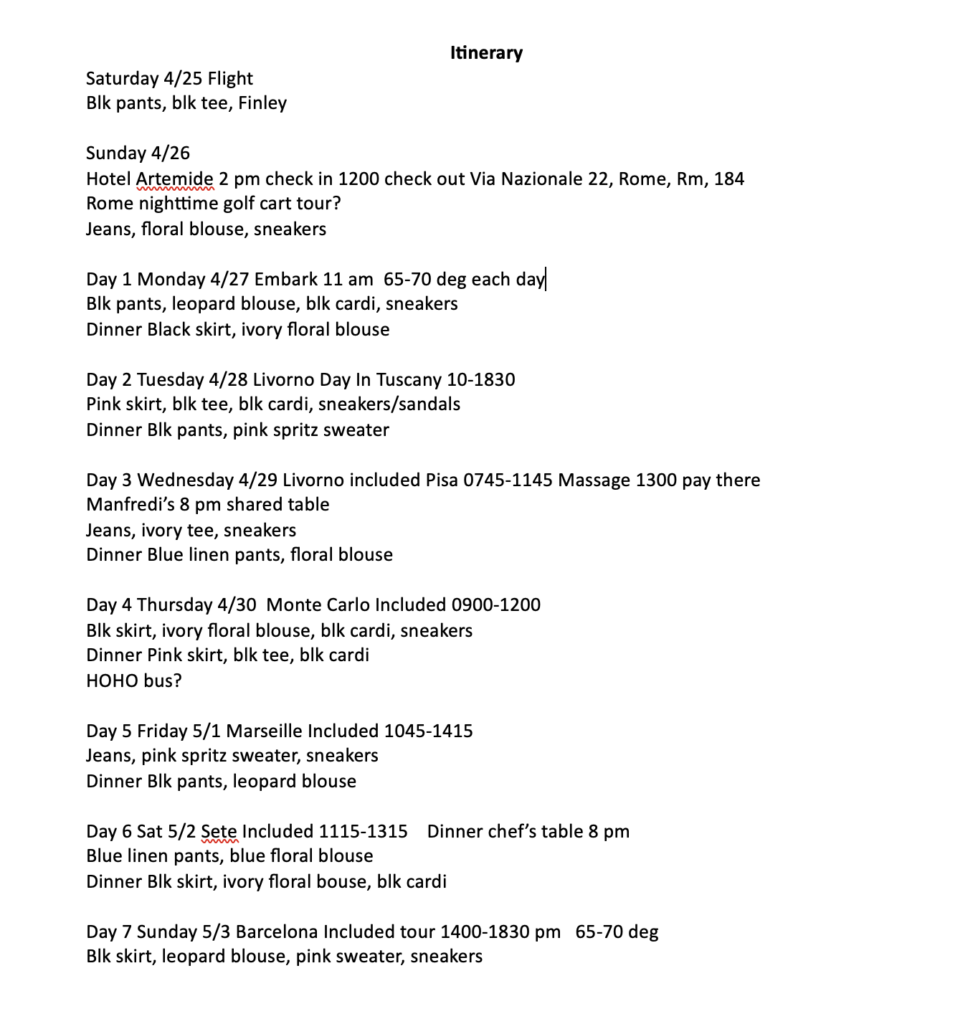
Briefly list what activities are planned for each day. My itinerary with dates goes at the bottom of my clothing list. This will help you add appropriate clothing to your list.
Check the Weather History for Your Destinations
I use Weather Underground. You can see the weather history for just about anywhere you want to travel. I look at the history for the past few years for the weeks I plan on traveling, and jot it down on my daily itinerary page. Of course, temps and weather conditions can vary greatly from year to year, but looking back over a few years gives you a pretty good idea of what to expect in general. You will want to check the actual forecast 2 days before you depart so you can make any packing changes as needed. Please don’t ask people on facebook what the weather is going to be.


Choose a Color Palette
Choose a color palette and stick to it. I pick three main colors, often black, white, and gray, and a coordinating color or two like teal, pink, red, or blue. I know what I like, and if I don’t already wear it at home, I won’t wear it on a trip.
Use a Capsule Wardrobe
There are tons of capsule wardrobe videos and articles available online, so I am not going to re-invent the wheel here. The concept is simple. Choose clothing items in a similar color palette with individual pieces that can be mixed and matched to create different outfits. There is no set rule for how many of each clothing item you should pack. You may have heard of the 5-4-3-2-1 rule, or the Sudoku method, or three tops for every bottom, or any number of other packing strategies. You can read our capsule wardrobe article for more info.
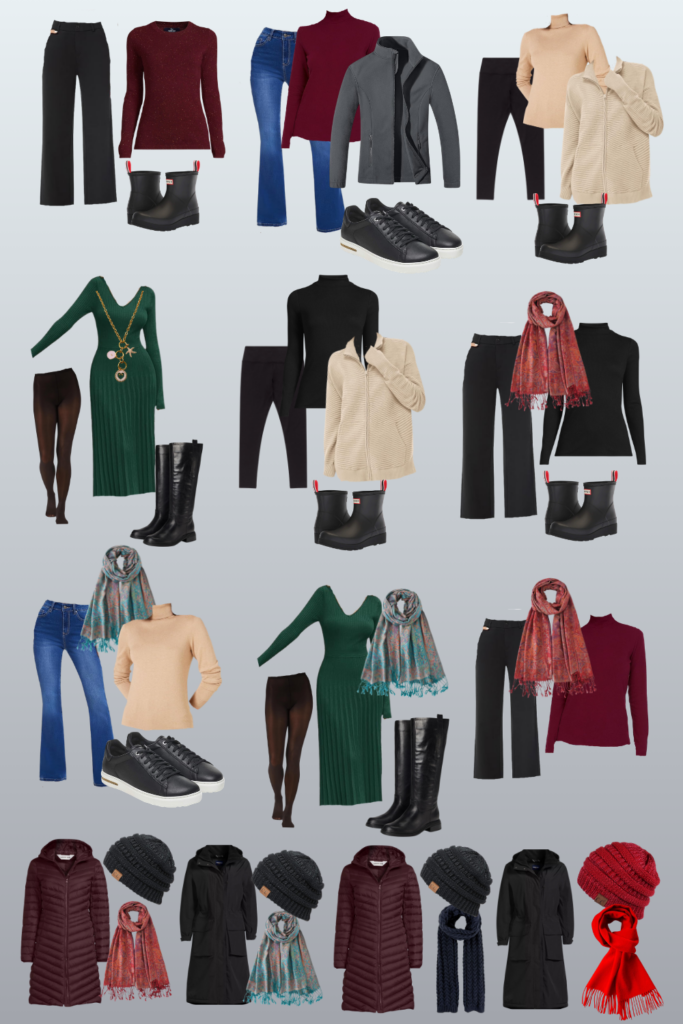
Here is my strategy: I take at least three distinct full outfits for every trip. Each outfit consists of a bottom, a top, and a layer. The layer is a cardigan, blouse, sweater, or lightweight zip up, that can be worn over the top or, depending on the item, perhaps alone with the pants. Believe it or not, you can make 45 different outfits out of nine pieces of clothing. I did the math for you. We need way less clothing pieces than we think. We don’t need 14 pants and 14 tops for a two week trip.
Start by choosing three pants, three tops, and three layers. Add a dress or skirt if you like. Add a pair of shorts if your destination calls for them. These are general suggestions for all trips, not steadfast rules. I often start with 9 pieces, and add one pair of leggings and a lightweight tee to wear when relaxing in the room. These two pieces can double as base layers if our destination is cold. I add one casual black dress for a river cruise, or add three dresses or skirts for a two week ocean cruise. We like to dress up a bit for dinner on cruises, and I often wear a casual dress or skirt for day touring, depending on the destination and weather. The collage below is a perfect example of my three outfit strategy for a trip to Berlin, with extra hats and scarves thrown in to change up the look for outdoor photos.

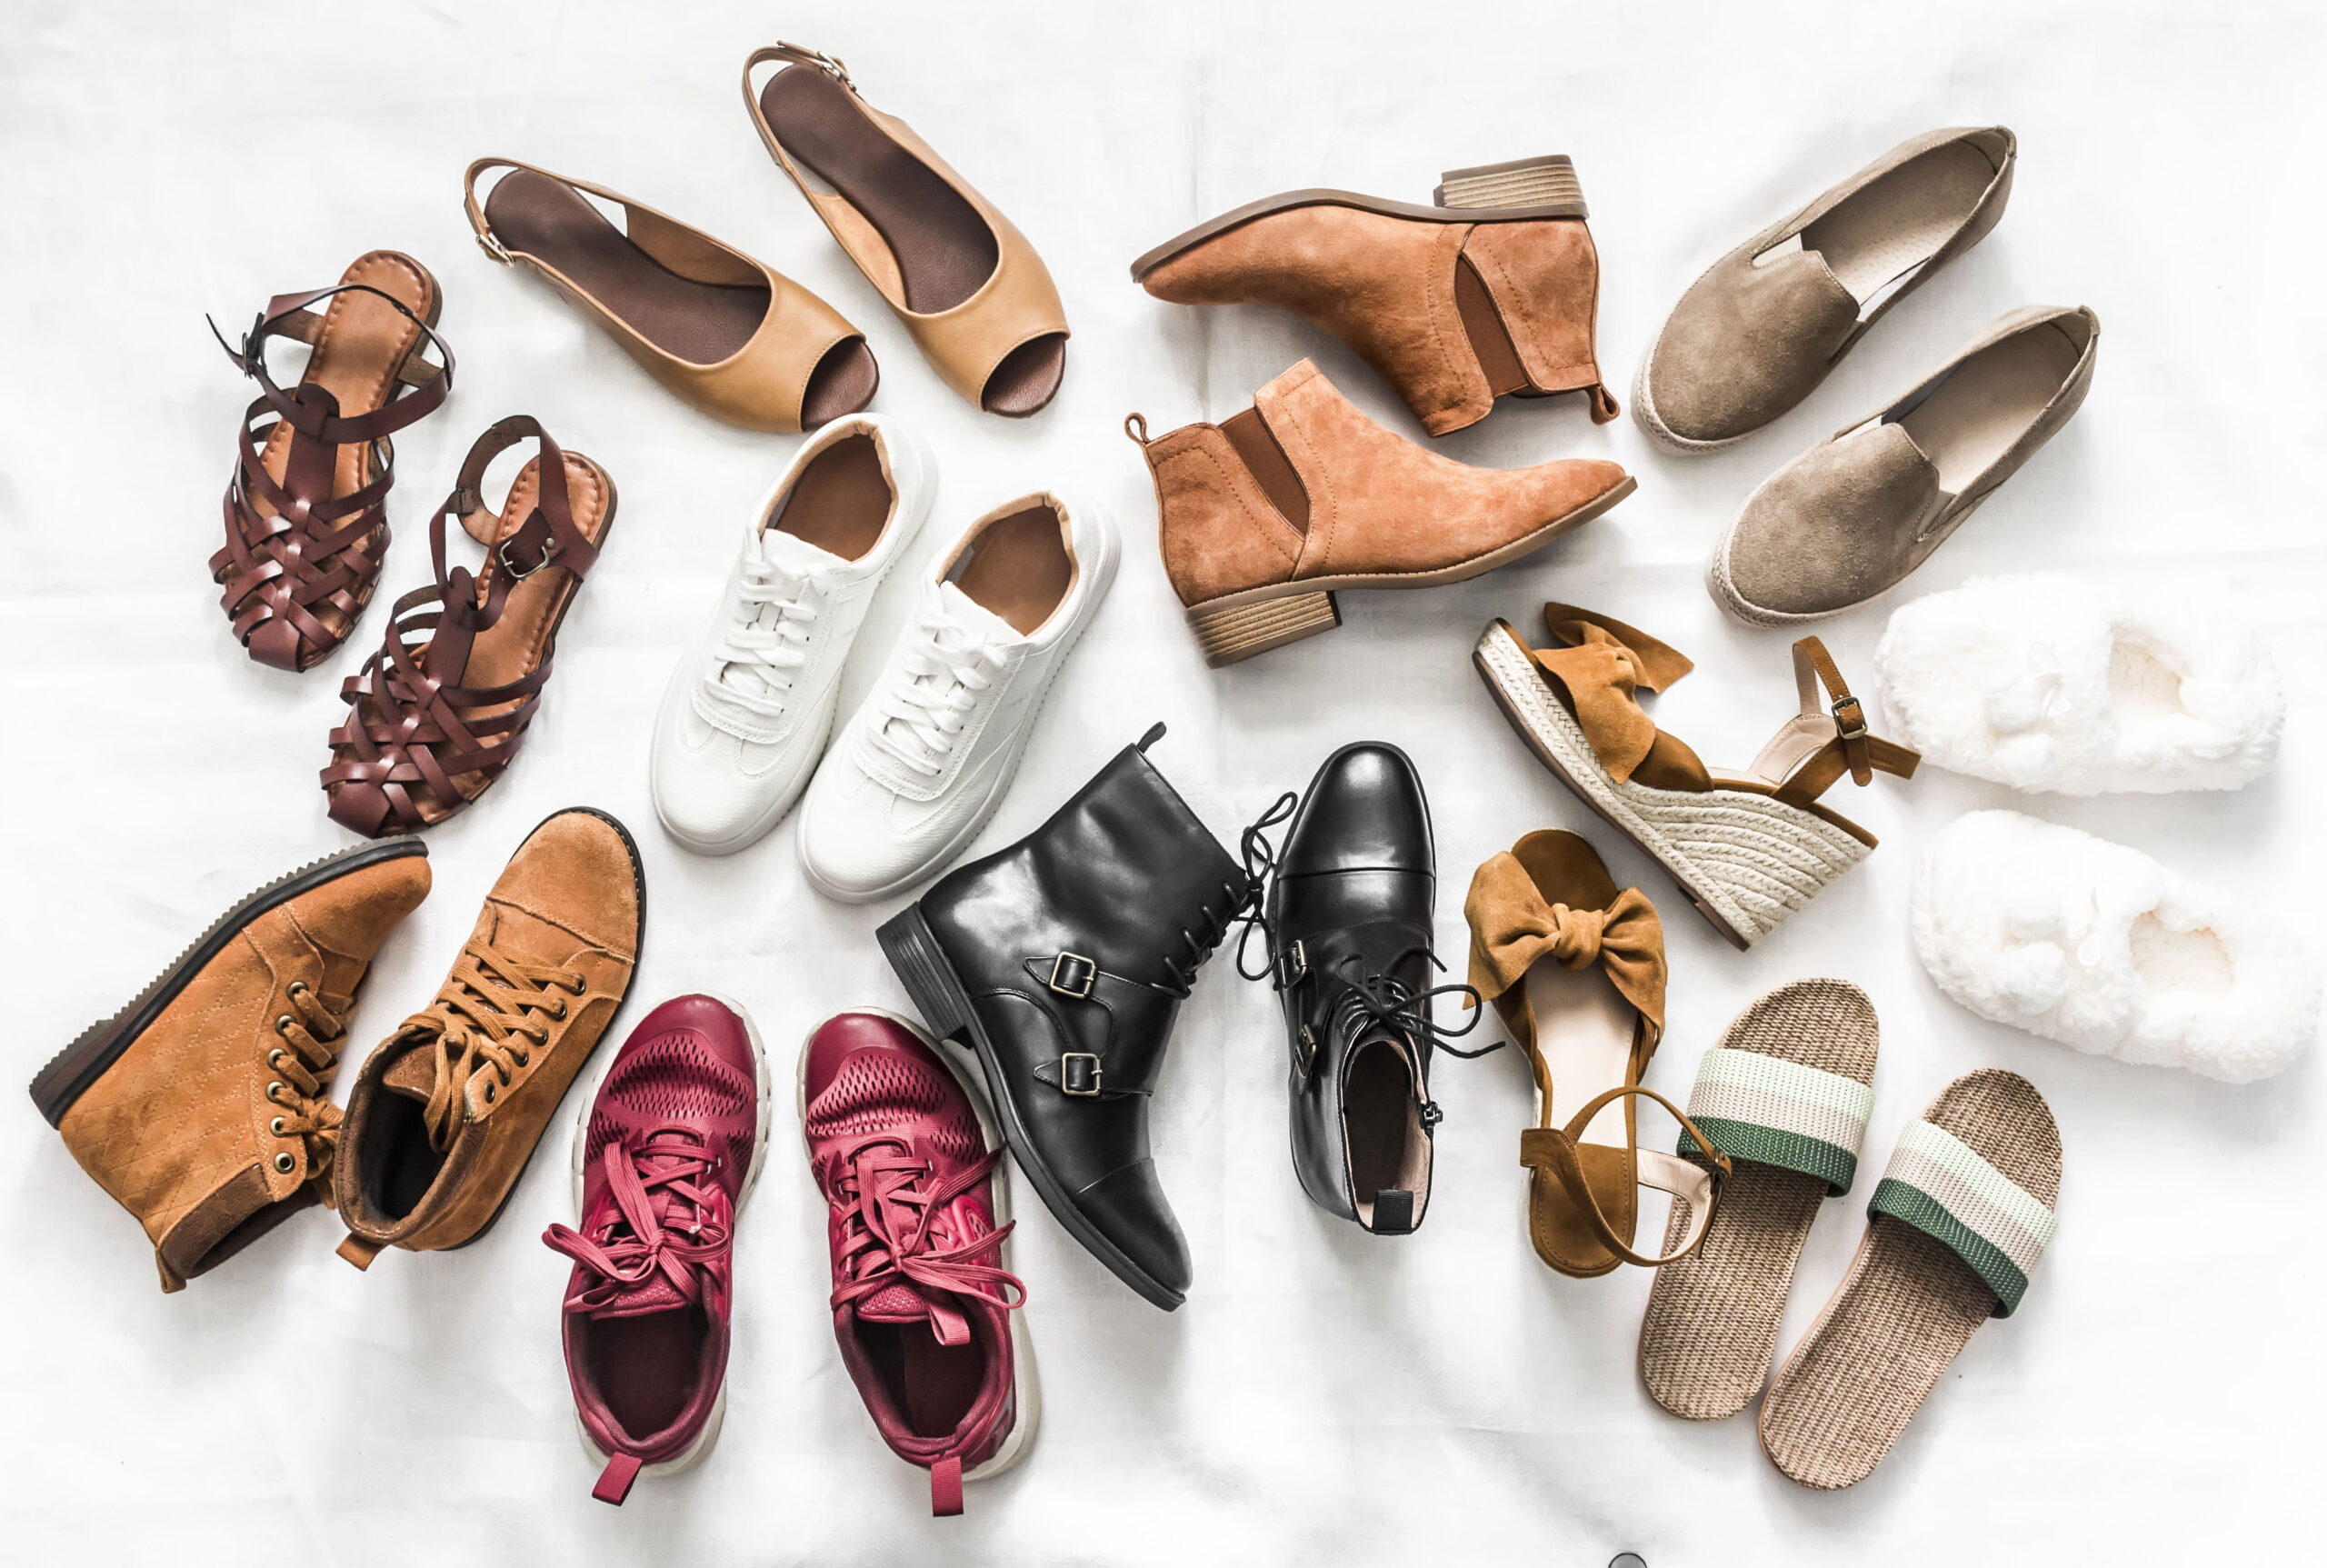
Choose Three Pair of Shoes
Wear your heaviest pair of shoes on the plane. The best shoe advice I ever read was from Alex Jimenez at Travel Fashion Girl. Alex says to choose no more than three pair of shoes for any trip. One is the main pair for day touring, such as a sneaker. Two is an activity shoe, chosen for a specific activity for that particular trip, such as a hiking shoe. The third pair she calls the wild card, and can be any shoe you choose for variety or comfort. In the example above, my touring shoe was the sneakers, my activity shoe was the tall boots to wear with the dress, and the wild card was the waterproof Hunter boots. I wore the heaviest pair, the Hunter boots, on the airplane. On a recent African safari, I took sneakers for the twice daily game drives (touring shoe), EVA flip flops (Gizeh, link below) for waterfalls, showers, and pool use (activity shoe), and sandals for evenings or city touring (wildcard).
I admit I do struggle with planning only three pairs of shoes. I have wide feet and a chronic pain condition, so I sometimes pack two sneakers (often leather Birkenstock Bend and a Skechers athletic sneaker), flip flop type sandals (Birkenstock Mayari or Gizeh), and either Chelsea boots for cold weather trips, or wedge sandals (Birkenstock Soley) for warm weather cruises. I have a pair of Rothy’s flats that pack really small, so sometimes pack those. It’s very hard for me, as you can see. The struggle is real.
Pack Versatile and/or Convertible Clothing
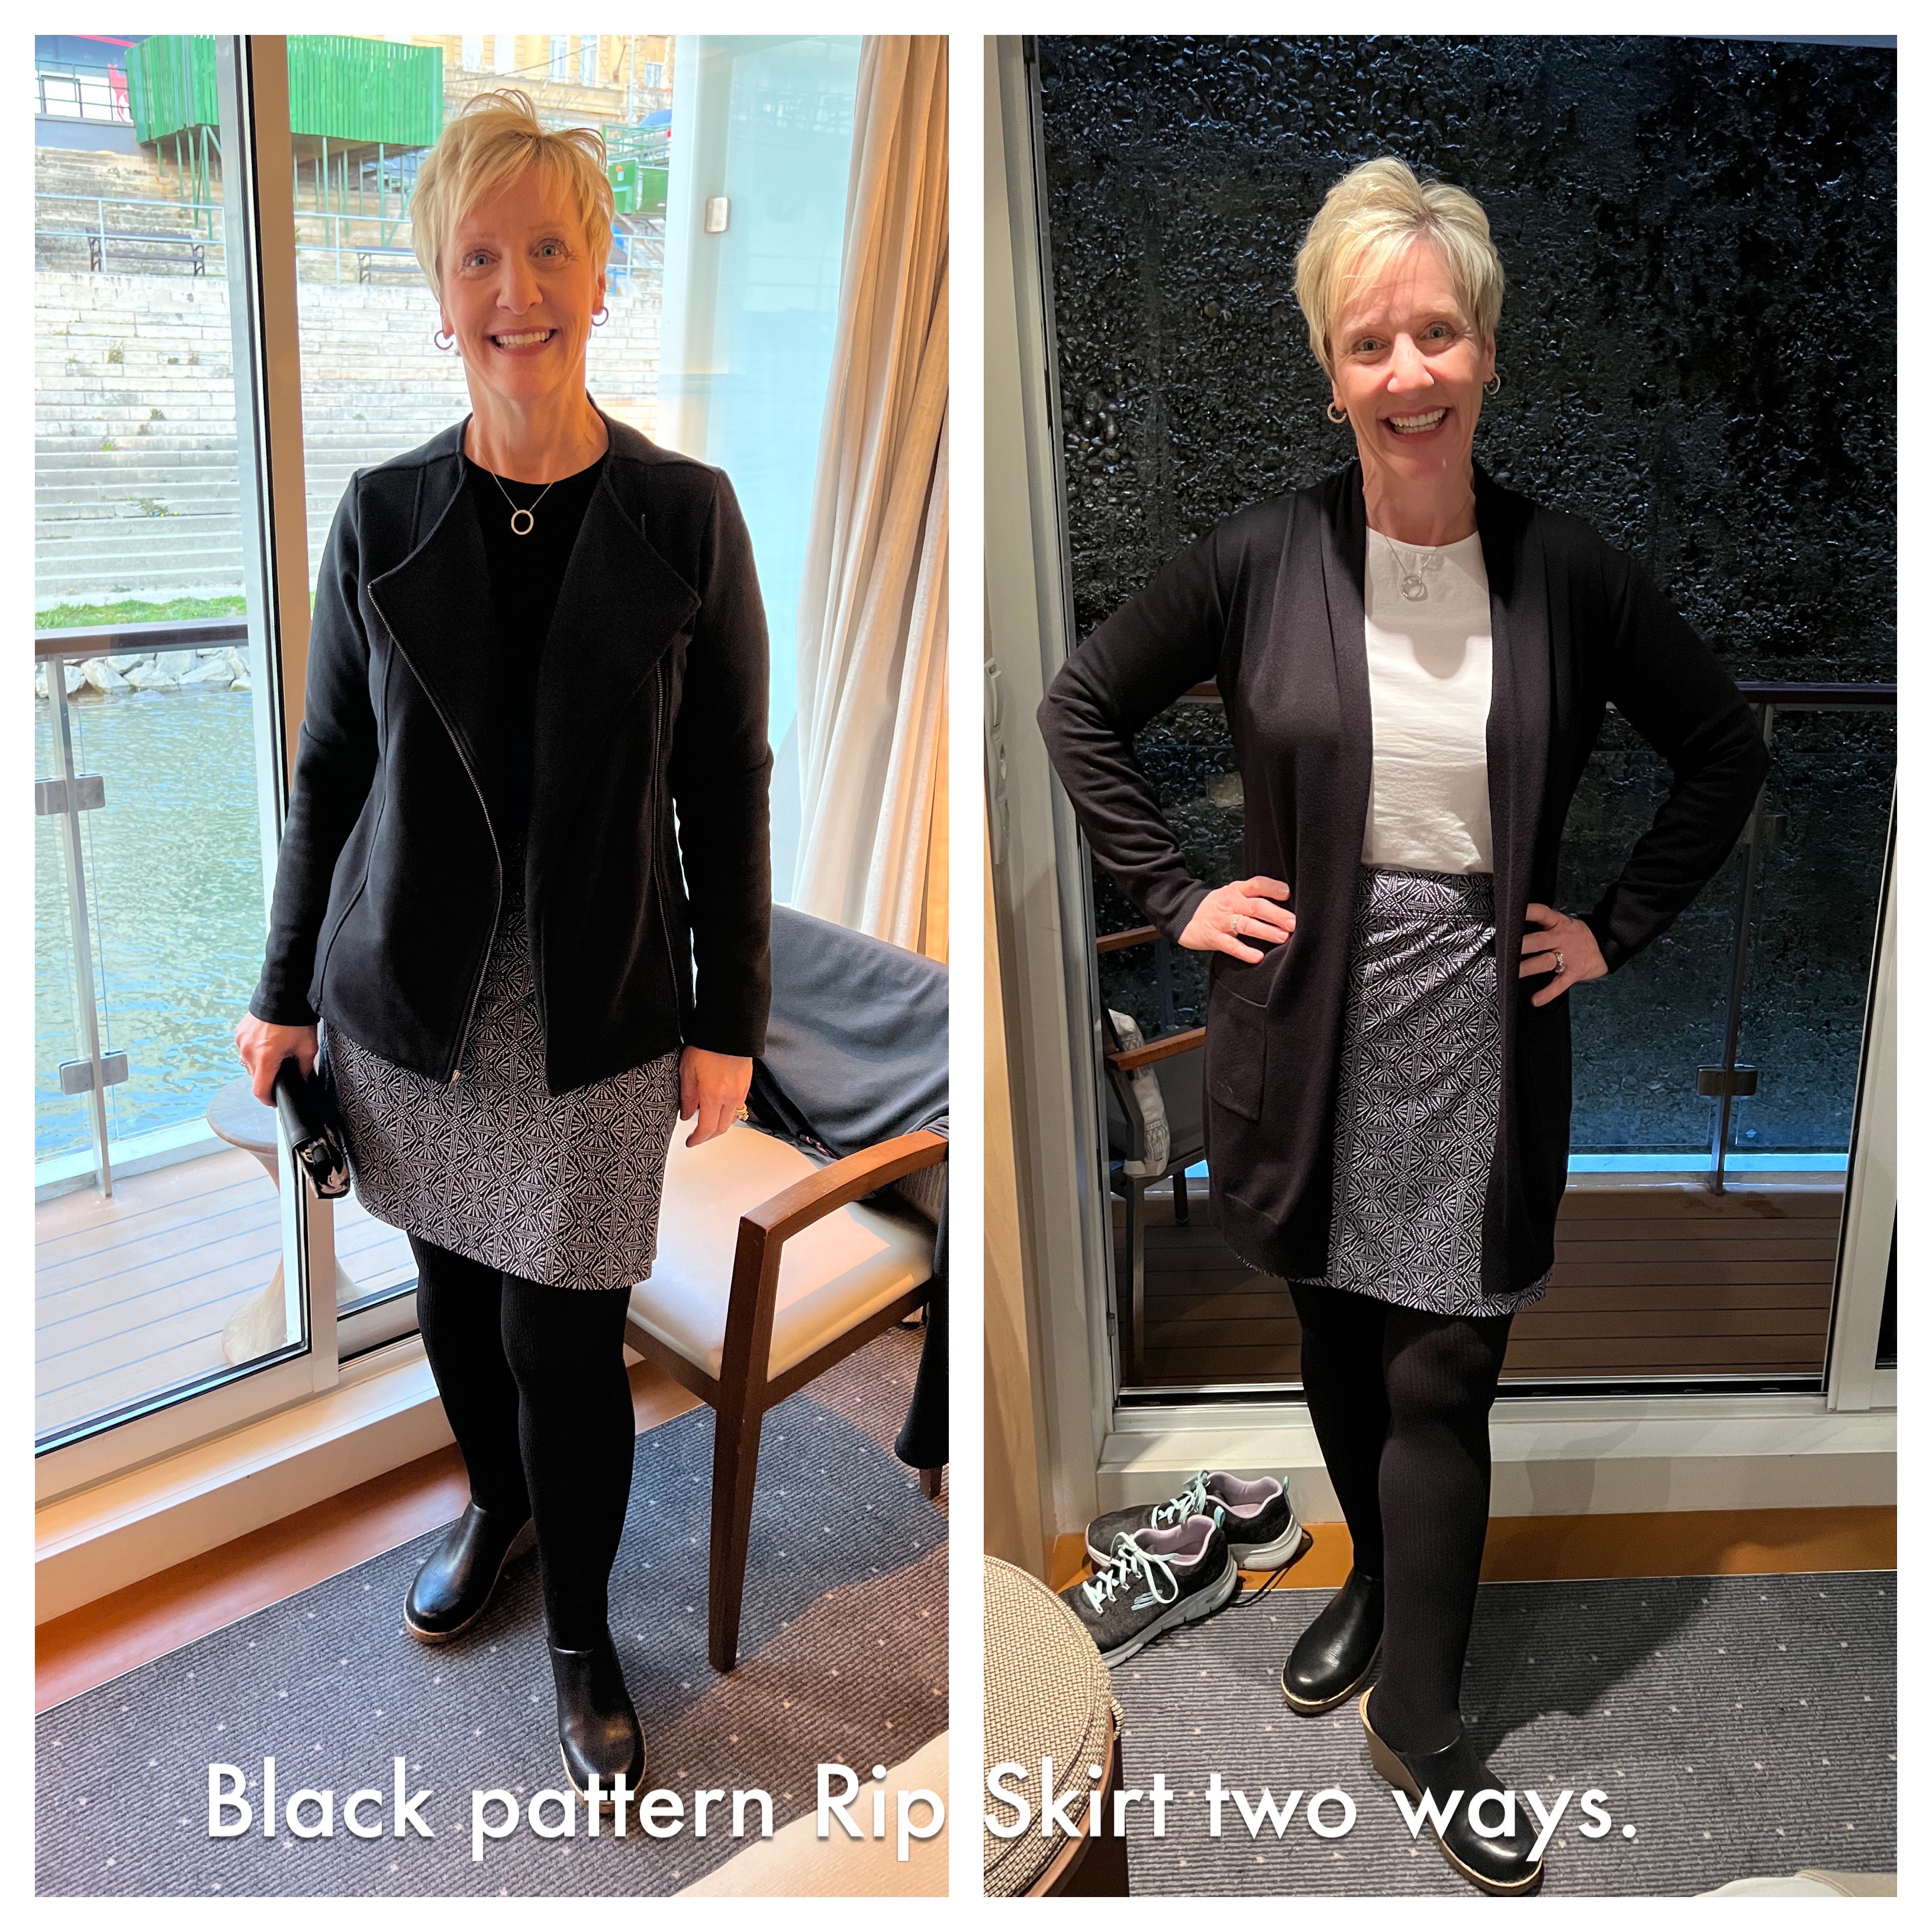
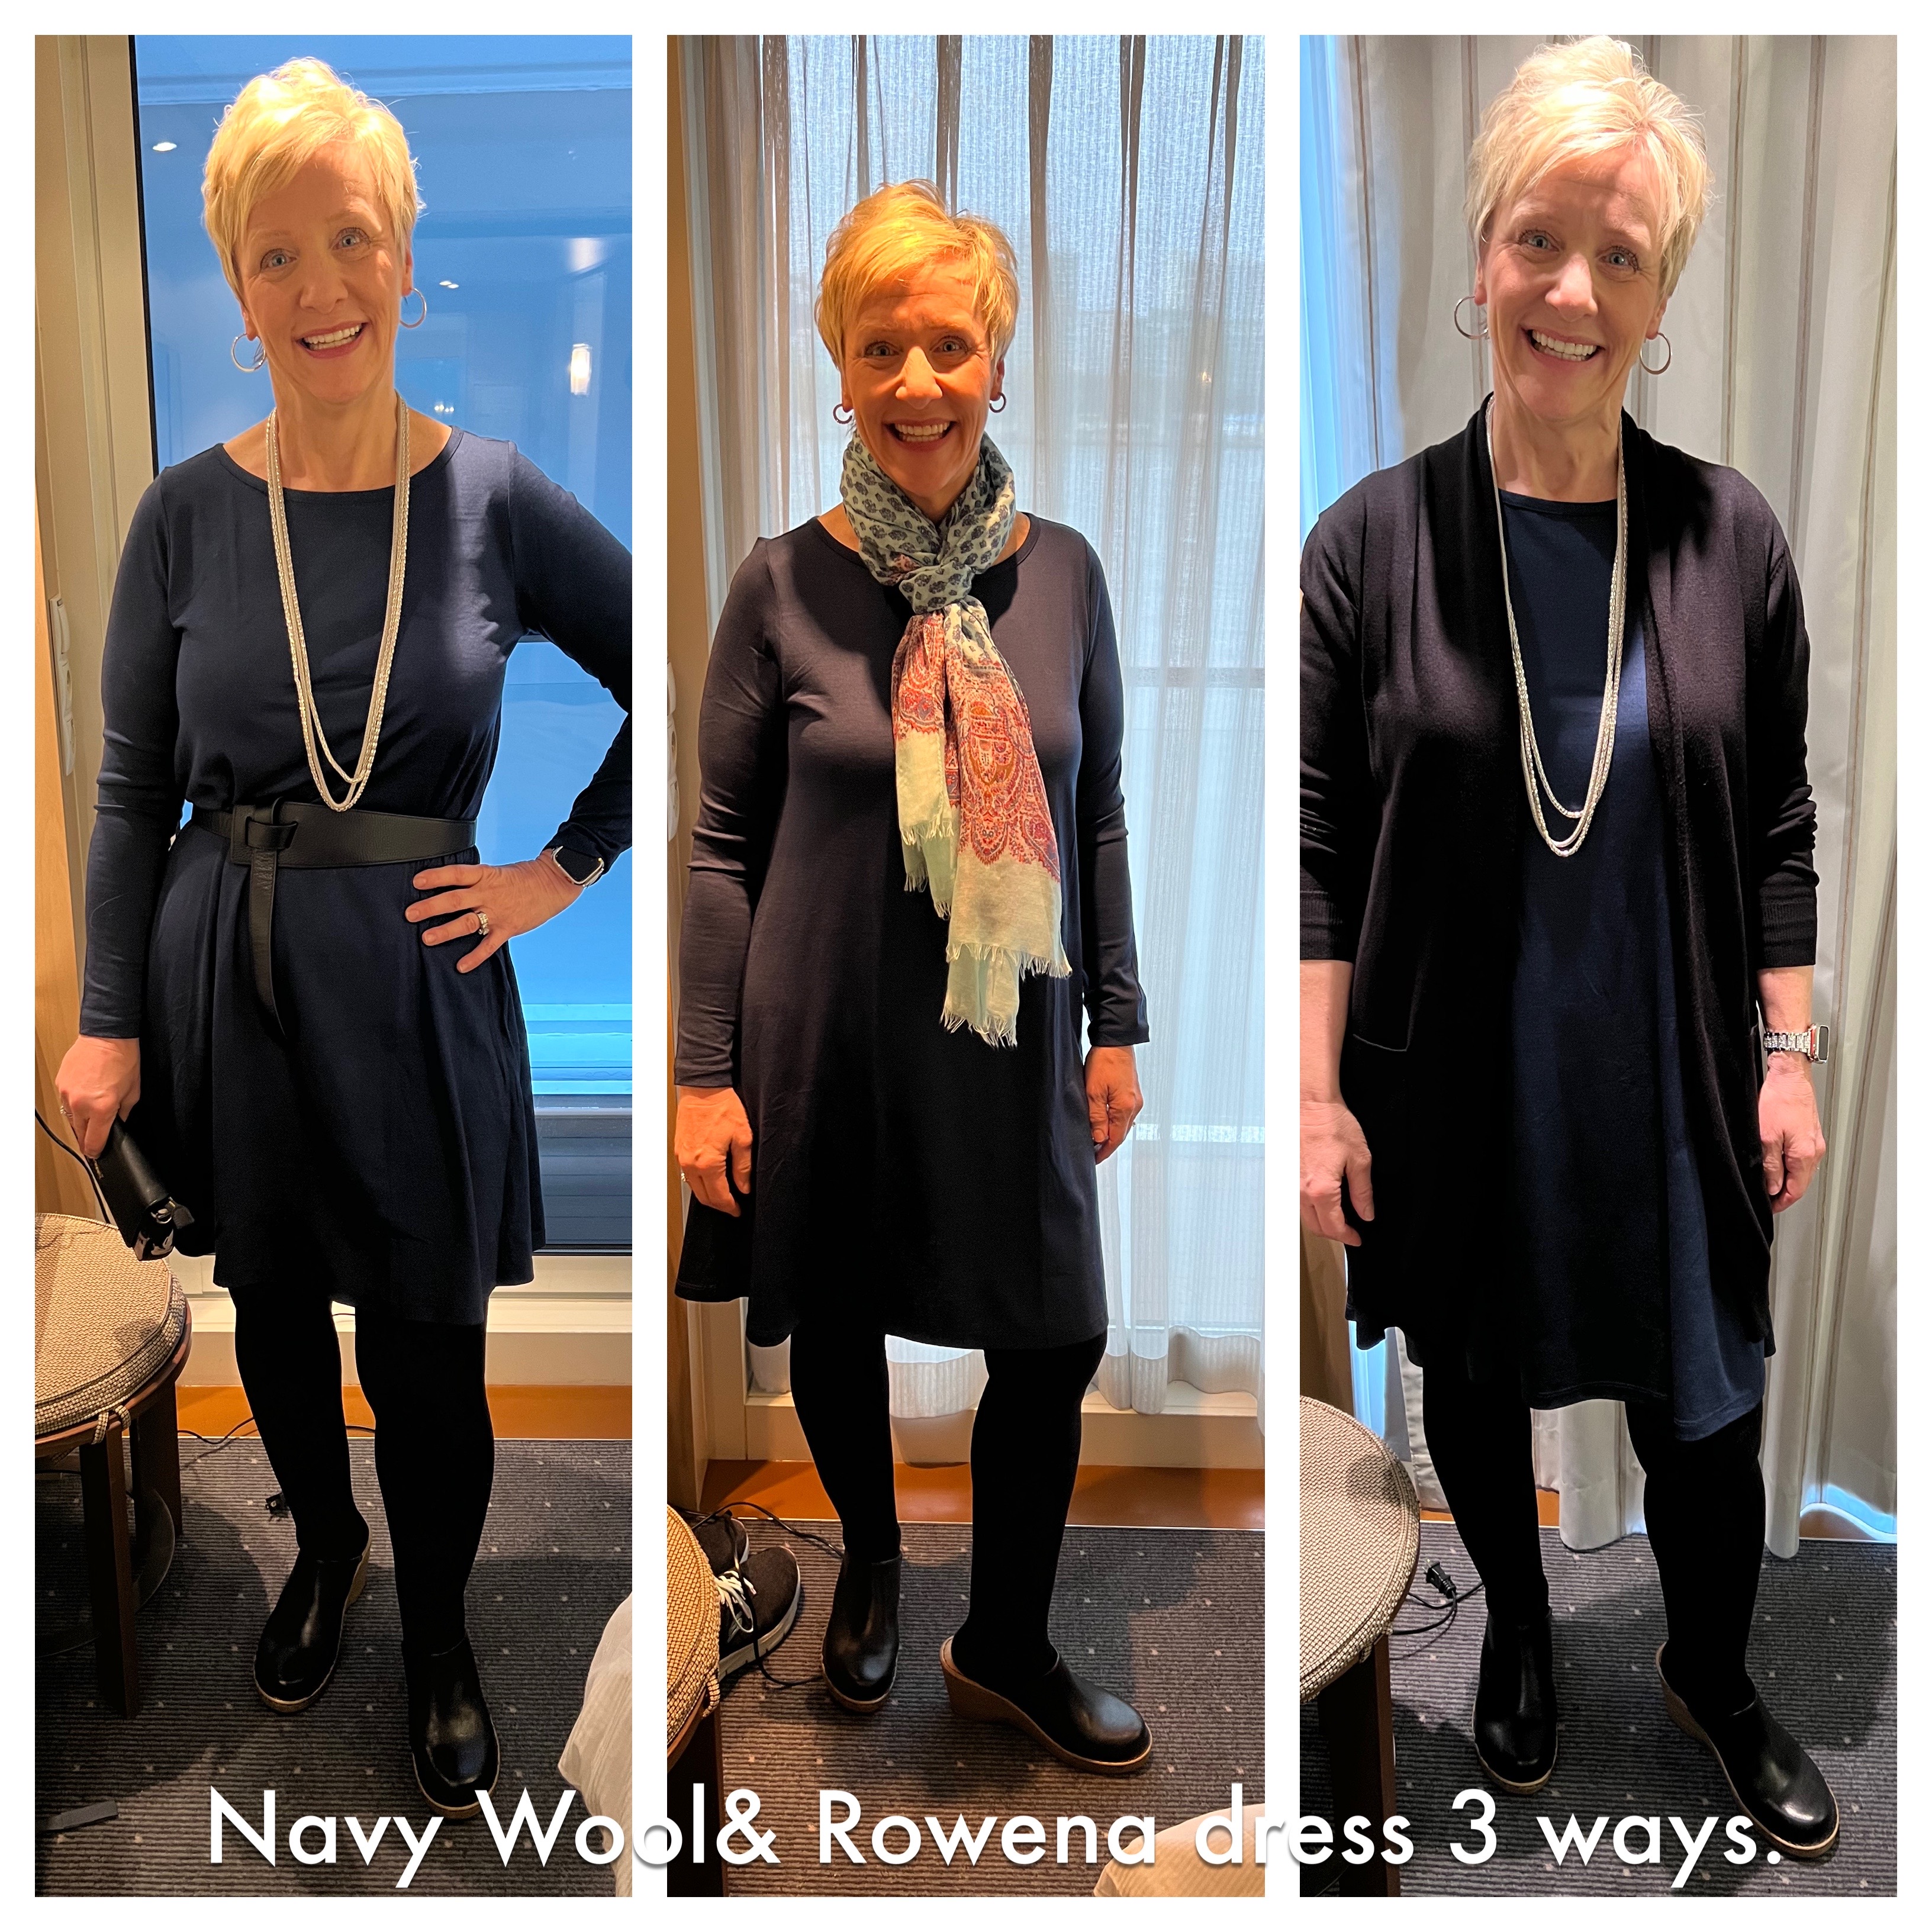
Lots of convertible clothing exists, from maxi skirts that can do double duty as a strapless dress, to truly reversible skirts and dresses, to wraps that convert to sweaters. I have a 4-way reversible dress from White House Black Market that I like to pack for cruises. Also consider styling the same outfit in different ways. In the photos below, I am wearing a Rip Skirt Hawaii length 2 wrap skirt in two different ways, and the Wool& Merino wool Rowena dress in marine blue in three different ways on a Viking Danube river cruise.
Pack Clothing that is Lightweight and Quick Drying
We love merino wool shirts, pants, sweaters, and jackets. We also like lightweight pants made from nylon, such as Columbia or Eddie Bauer travel or hiking pants. Lightweight, quick drying clothing is easy to sink wash and it will be dry in just a few short hours. I have an article called Why We Love Merino Wool where you can read more about the great properties of Merino. Merino wool is lightweight, moisture wicking, quick drying, temperature regulating, antibacterial, and does not need to be washed as often as cotton or synthetics. It’s a game changer for travel and I wear it about 90% of the time at home also.
Choose Minimal Accessories
I usually pack a lightweight colorful scarf and maybe two necklaces. I’m just not a big jewelry person, so a couple necklaces can change up a simple black top or dress. Perhaps consider a tee shirt clip to change the look of longer shirts. It can also double as a scarf clip. Or perhaps consider a decorative brooch to wear alone or to secure a scarf.
Plan a Daily Outfit
For each day, under your itinerary with the brief plan for the day’s activities and the general temp to expect, plan a daily outfit. I plan each day’s outfit around the activities and average temps, and write it down. Pants, top, layer if needed, jewelry, and shoes. This allows me to see what I plan on wearing each day, how I can mix and match my clothing items and colors, how many times I plan on wearing each item, and if and when I will need to wash them.
Assess and Reassess
Go back and assess your list and see how many times you plan to wear each item of clothing. My rule of thumb is if I don’t plan to wear it at least twice on a one week trip, or at least three times on a two or three week trip, it doesn’t get precious space in my bag. My only exception is for dress up nights on an ocean cruise. I wore scrubs for 32 years and I like to dress up, so I make room for my one dressy outfit for these trips.
Make Adjustments as Needed
Add or subtract bottoms, tops, layers, or dresses until you are planning on wearing each item two or three times at a minimum. This Alaska packing list is what I took for a 9 day girlfriend cruise in September, with cool rainy weather expected, and dress up evenings planned. The Italy packing list was for a full three weeks with a 10 day cruise included, also in September, when it was mostly hot, but with an excursion to chilly Mt Etna planned. Not on the list are undergarments and a rain jacket. Taking my own advice is difficult, because I do like to have choices and look nice, so I still overpacked on each of these trips. Could have done with one less complete outfit on each list. When I get home, I make notes on the list of what worked and what I should have done differently. I learn something from each trip I take, and that’s why I’m sharing my tips with you.
Plan to Do Some Sink Laundry
Do some sink laundry or choose accommodations with a washer and a dryer if possible. I just use the hotel or cruise ship’s provided soap to sink wash my items as needed throughout the trip. Of course, I wash undergarments after one wear, because I’m not gross, and I don’t pack 14 pair of underwear for a two week trip. I pack three bras and four pair of underwear for every trip. I think we all tend to wash our clothing too much in general, which wears them out much faster than they should. Think about how many times you wear an item to and from the grocery, or to pick up kids, out to dinner, or to run a quick errand. They don’t need to be washed every time they are worn. Now, YMMV if you are participating in hot sweaty activities. The reality is that if you are determined to travel with a carry-on and a personal item, you will have to wash some clothing along the way. Sink laundry doesn’t take much time, it’s easy to do, and your clothes are clean and dry the next morning. If you balk at having to do any kind of laundry while on vacation, that’s fine, and these tips are not for you.


Do a Practice Pack
Literally pack up all your clothing, toiletries, liquids, shoes, and other items. Every item on your list goes into the bag or the personal item. I pack all my electronics, chargers, toiletries, and meds in my backpack, just to be safe in case the airline forces me to gate check my carry-on rolling bag. I know I can buy most of these items at my destination, but I like my comfort products, and why do that if I don’t have to? I also add one complete outfit (bottom, top, layer) to my backpack for the same reason. This way, I can get by with two complete outfits I can mix and match, plus all my essentials in the case of a lost or delayed bag. Make sure it all fits in the bags and make sure it’s under the weight requirement if your airline has one. If it doesn’t fit comfortably, it’s time to reassess what’s on your list and remove some things. Remember, carry-on packing is not about how much you can actually stuff into the bag.
Experiment with Different Packing Methods and Strategies
Some people love traditional mesh packing cubes for organization. Some prefer compression cubes, because they feel they can squeeze more items into their bags. Some folks roll their clothing and some folks pack flat. I prefer to fold my clothing, then stand it upright like index cards that you can flip through to find what you’re looking for, without removing everything from your bag to get to what’s on the bottom.
Wear Your Heaviest Items on the Airplane
If you need a heavier jacket or coat, try carrying the coat on the airplane with you, and/or wearing it when you board the airplane. Coats do not count against your two item limit for carry-on. I pack a puffer coat for our trips to the Christmas markets, and I squish it down into a gallon size zip lock bag to pack it. This method works better than any packing cube I have ever found. We went to Antarctica recently, and planned to carry our waterproof parkas on the airplane with us. Ultimately, I accidentally left mine in the back seat of my car at the airport, but we had a good packing plan!
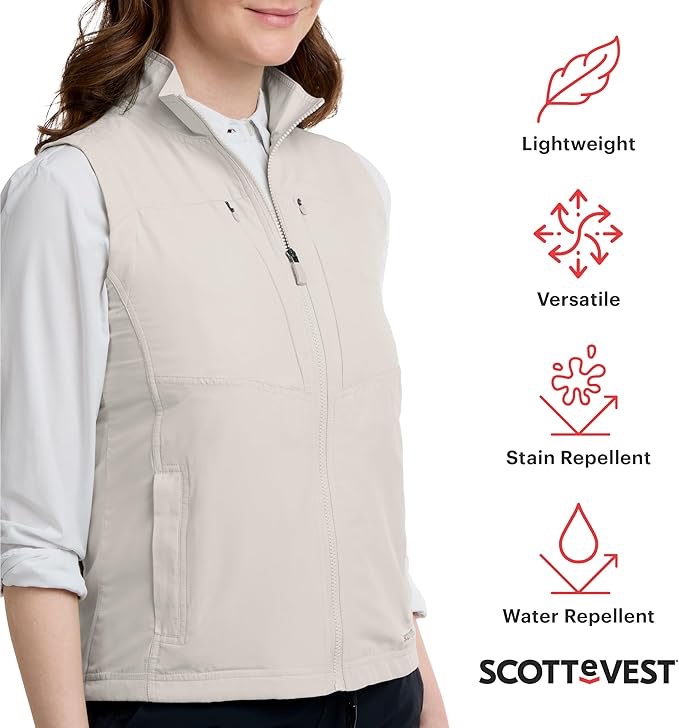
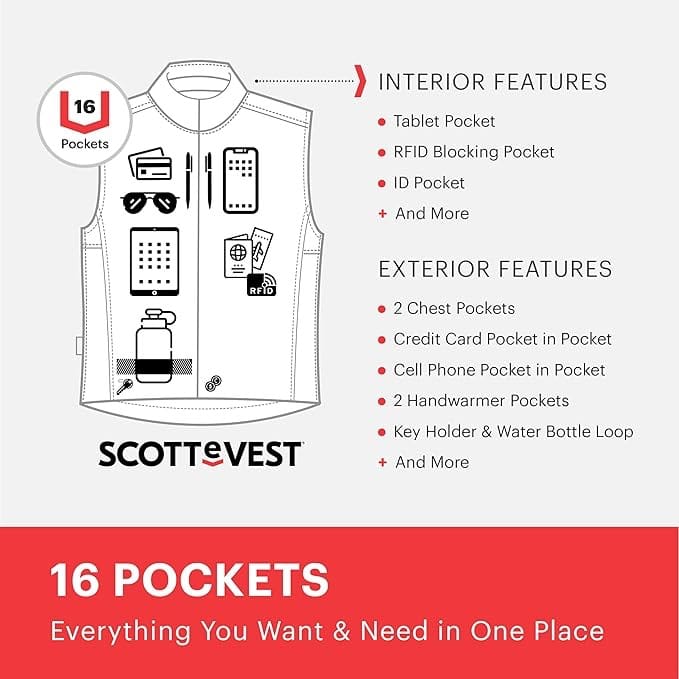
Consider a Travel Vest
Some people really like the travel vests with all the pockets like those made by the ScotteVest company. Similar styles, like a fishing vest, can be found locally or on Amazon. I have never tried this personally, but have read multiple accounts of bloggers who swear by this method. They like this because they can fit most of the items they will need on the flight into the pockets of the vest, including an iPad, phone, chargers, medications, snacks, eye mask, and other essentials. This frees up room in their personal item for a change of clothes and other important items. I do love a jacket with inside pockets for airplane travel. I almost always wear my WoolX Finley or WoolX Zoey jackets when I fly.
Cross Pack
If you travel with a partner, consider cross packing your clothing in your partner’s bag. Try to swap at least one complete outfit and a pair of shoes with your partner in their rolling bag. If you are forced to gate check your bags, and only one bag is lost or delayed, you will both still have clothing to wear. With the outfit each of you are wearing, the outfit in your backpacks, and the outfits in one of your rolling bags, you will both have at least three complete outfits. If both bags are lost, you will both still have two outfits and two pair of shoes. We cross pack on every trip and have not yet been forced to gate check our bags, but the day is surely coming.
Check Your Bag on the Way Home
Finally, we usually expand our bags and check them on the way home, when we aren’t as concerned about losing them. We don’t purchase a lot of souvenirs, but occasionally we need the extra space. Most often, we just want to cram it all in haphazardly and come home to our pets.
A Note about “Leaving it Behind”
Please, please, please, do not pack all your old underwear, clothing, or shoes and throw it away as you go, or “leave it behind” or “toss it” as people so graciously try to word it. This is just about the worst advice for carry-on packing that I have ever heard. It makes room for souvenirs, supposedly. Listen, no country wants your shitty old underwear in their landfill. Just don’t do this. It’s embarrassing that people even consider this as an option. I see it mentioned all the time in travel groups as a travel “hack.” (I also hate this term, BTW. Aren’t they merely suggestions or ideas???) Many developing countries have a huge problem with tons of trash. Please don’t contribute to it. This is a hill I will die on.
Donating your clothing is a different matter altogether, but do not leave your unwanted items “neatly folded on the bed” in your accommodations as if they are donations for the housekeeping staff. First of all, it’s offensive to assume they need or want your clothing. Secondly, many times, housekeeping has to report this to management and those items end up in the lost and found. Please find a charity shop if you are going to donate. Make sure it is a wearable item in good condition, and wash it first before donating. Some safari guides in Africa will actually ask you donate your clothing or shoes at the end of the trip, or you can ask if you would like to donate items for the camp staff or the local village. They are often quite appreciative, but always ask privately.
Summary
Carry-on packing affords you many benefits over checking your bags. Both methods of packing are useful depending on your trip and planned activities. It definitely takes some patience and practice to pull off carry-on packing successfully, and I have learned a lot along the way, mostly by trial and error. Again, if you want to check your bag, please do so, I am not judging. However, if you are truly interested in learning to pack a little lighter, follow the tips in this article and let me know how it goes.
Like what you read? Hate it? Please leave us a comment below, but don’t be bitchy. Happy Travels! (Your email address will not be shared.)